Utilizing Nessus
I wanted to document my first time using Nessus. Nessus is a vulnerability scanner that is free to use. I figured I would write out instructions if anyone wanted to follow along and try it themselves.
First download Nessus by using the link Tenable Nessus
Essentials Vulnerability Scanner | Tenable® this will send an email with an
activation code. It also says download Nessus, you can click on this to being
the download.
Select version of Nessus that you want. I went with windows
-86x64 because I’m running windows 10. Then click download.

Read through the license agreement and click I agree to begin download.
Next, click on your downloads and open file, InstallShield wizard will appear. Follow the prompts.

It will go through license agreement again, read through the
agreement and click I accept the terms in the license agreement and click next.
It will show you the destination folder for Nessus. Click next,
then click install.
It will ask do you want to allow this app to make changes to
your device, hit yes. My understanding is the app won’t work without clicking yes.

Click finish.
You will see “Notice: If you get a security alert from your
browser, you can accept the risk and continue or obtain a valid certificate
before proceeding. Please refer to the documentation for more information.”

You can read more about this by going to documentation, then
clicking configure tenable Nessus, then find security warnings near the top of
the page. The page then explains the security warning, and that Nessus uses SSL
on port 8834. Because Nessus is using a self-signed SSL certificate, this shouldn’t
be an issue. The page also walks you through how to bypass based on which
browser you’re using.
Once you bypass the security warning, it takes you to the welcome
to Nessus page. Do not Check register offline, then click continue. It will
show you register Nessus, select register for Nessus essentials.


Then create a user name and password.

Once that's done, it will then begin to download.
This takes a while.

Once finished you should see a page like this.

First click on your account in the top right corner and then go to API keys. Generate new keys. It wouldn’t work for me until I did this.
Go back to home screen and click new scan.
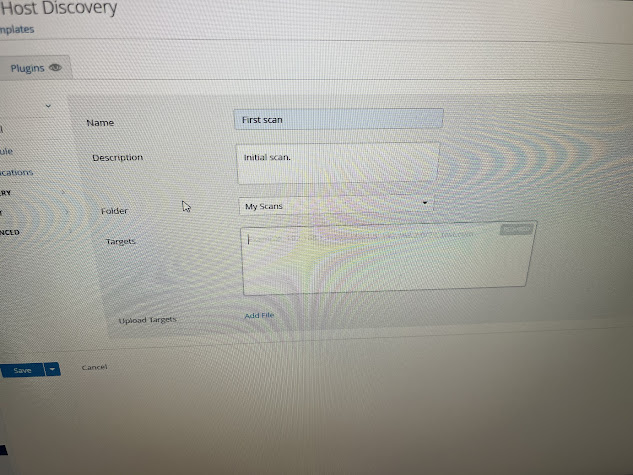
I did host discovery first. This scan is just used to hosts
on your network and information like operating system and open ports. Once you click
on the scan you want, fill out information, be sure to plug in IP address. To
start I put in my own for the first scan.
Under schedule, you can set a specific time to conduct the scan.
In notifications, you can set up an email address to send
the results.
Discovery allows you to choose what scan type you will do. I
went with the first option.
In the report section it allows you to display different
things in the report.

Under advanced, it has more options like network time out
and excluding files.
Once you are satisfied with your choices, hit save. You
should see the new scan in the main menu. Check the box next to your scan and click
more. Then go to launch.

After a few minutes you should see the ports that were scanned.
You will also see vulnerabilities and other info.
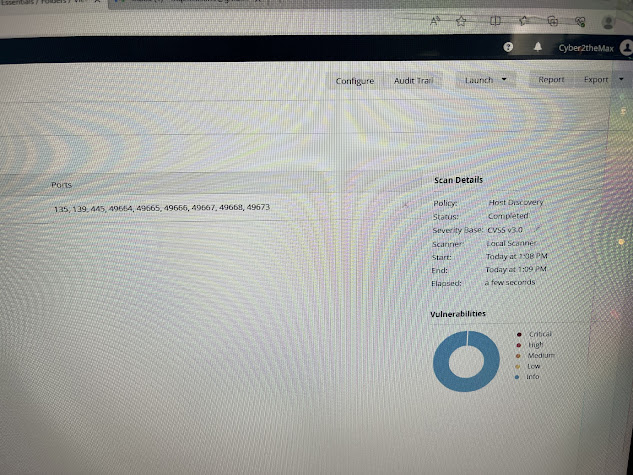
Click on the scan for more information.
For my scan, I could see the scan information and what was
used to ping the remote host as vulnerabilities, but they were only info.
Scan info just tells you about the scan itself.
Ping the remote host just tells what was used to ping the computer and if the host was up.
Next, I went to basic network scan. This scan is used for a
basic overview for an asset. The process was mostly the same, except this time
I added the IP address of one of my virtual machines that I have running on my
computer. Follow the same process as before, click save, then go back to the
main screen and launch.
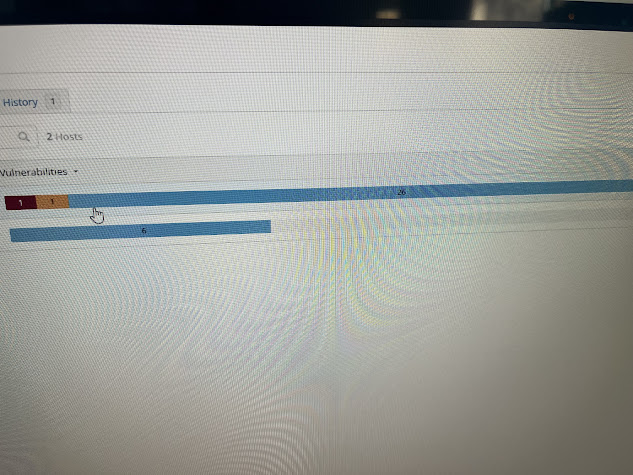
This one took a bit longer. It shows both hosts and the number
of vulnerabilities on that host. You can then click on each host to see the specific
vulnerabilities. You can then go further and click on the vulnerability itself to
see what is said about it.

Nessus offers other scans besides the two I used. My next step is to test out the other scans on my virtual machines and try to fix the vulnerabilities. At the time of this posting, I fixed one of the vulnerabilities and am working on the other.
Comments
Post a Comment